使用Harbor搭建私有镜像站
虽然我们在日常使用中可以直接从 dockerhub 上拉取官方镜像, 我们自己打包的镜像也可以上传上去, 但如果是在公司里面使用, 直接上传可能就不太合适了, 毕竟dockerhub免费使用, 上传的镜像也需要公开给别人, 付费功能又要花钱, 没啥必要
因此我们可能就需要搭建一个私有的镜像仓库, 这样的话就可以相对没有顾虑地随意上传镜像, 同时一个内网的私有镜像仓库也可以极大地加快镜像的拉取速度, 不容易受到网络波动的影响, 因为有的时候在国内环境会无法访问到dockerhub
这边推荐一个开源的私有仓库搭建工具 Harbor, 它可以方便的搭建一个私有的镜像仓库, 并且支持权限管理, 镜像扫描等功能, 非常适合企业内部使用
下载安装包
首先通过以上的地址下载安装包, 在线和本地的都可以, 这边以在线安装的为例
wget https://github.com/goharbor/harbor/releases/download/v2.11.2/harbor-online-installer-v2.11.2.tgz
tar xvfz harbor-online-installer-v2.11.2.tgz
cd harbor
下载解压之后进入 harbor 目录, 可以看到以下文件
prepare
LICENSE
install.sh
common.sh
harbor.yml.tmpl
其中 harbor.yml.tmpl 是配置文件模板, 我们需要复制一份并修改
cp harbor.yml.tmpl harbor.yml
配置文件修改
配置文件主要修改以下几个地方
# Configuration file of Harbor

# The IP address or hostname to access admin UI and registry service.
# DO NOT use localhost or 127.0.0.1, because Harbor needs to be accessed by external clients.
hostname: 127.0.0.1

http:
  port: 80

# # https related config
# https:
#   # https port for harbor, default is 443
#   port: 443
#   # The path of cert and key files for nginx
#   certificate: /your/certificate/path
#   private_key: /your/private/key/path
#   # enable strong ssl ciphers (default: false)
#   # strong_ssl_ciphers: false

# # Harbor will set ipv4 enabled only by default if this block is not configured
# # Otherwise, please uncomment this block to configure your own ip_family stacks
# ip_family:
#   # ipv6Enabled set to true if ipv6 is enabled in docker network, currently it affected the nginx related component
#   ipv6:
#     enabled: false
#   # ipv4Enabled set to true by default, currently it affected the nginx related component
#   ipv4:
#     enabled: true

# # Uncomment following will enable tls communication between all harbor components
# internal_tls:
#   # set enabled to true means internal tls is enabled
#   enabled: true
#   # put your cert and key files on dir
#   dir: /etc/harbor/tls/internal


# Uncomment external_url if you want to enable external proxy
# And when it enabled the hostname will no longer used
# external_url: https://reg.mydomain.com:8433

# The initial password of Harbor admin
# It only works in first time to install harbor
# Remember Change the admin password from UI after launching Harbor.
harbor_admin_password: Harbor12345

# Harbor DB configuration
database:
  # The password for the root user of Harbor DB. Change this before any production use.
  password: root123
  # The maximum number of connections in the idle connection pool. If it <=0, no idle connections are retained.
  max_idle_conns: 100
  # The maximum number of open connections to the database. If it <= 0, then there is no limit on the number of open connections.
  # Note: the default number of connections is 1024 for postgres of harbor.
  max_open_conns: 900
  # The maximum amount of time a connection may be reused. Expired connections may be closed lazily before reuse. If it <= 0, connections are not closed due to a connection's age.
  # The value is a duration string. A duration string is a possibly signed sequence of decimal numbers, each with optional fraction and a unit suffix, such as "300ms", "-1.5h" or "2h45m". Valid time units are "ns", "us" (or "µs"), "ms", "s", "m", "h".
  conn_max_lifetime: 5m
  # The maximum amount of time a connection may be idle. Expired connections may be closed lazily before reuse. If it <= 0, connections are not closed due to a connection's idle time.
  # The value is a duration string. A duration string is a possibly signed sequence of decimal numbers, each with optional fraction and a unit suffix, such as "300ms", "-1.5h" or "2h45m". Valid time units are "ns", "us" (or "µs"), "ms", "s", "m", "h".
  conn_max_idle_time: 0
根据自己的情况调整这些高亮的配置项, 在内网环境下不推荐使用 https, 所以可以注释掉 https 相关的配置, 端口其实也不需要修改, 因为这儿定义的是容器内的端口, 启动镜像的时候会映射到宿主机的端口, 保持默认的最方便
安装与部署
harbor 文件夹中包含了一些可执行的二进制文件和安装脚本, 在完成配置项的修改后可以执行一下
./prepare && ./install.sh
执行之后会生成一些配置文件, 并且处理一些可能缺失的依赖, 最后启动 harbor 服务
CONTAINER ID   IMAGE                                 COMMAND                  CREATED          STATUS                      PORTS                       NAMES
0b903f107de0   goharbor/harbor-jobservice:v2.11.2    "/harbor/entrypoint.…"   39 seconds ago   Up 33 seconds (healthy)                                 harbor-jobservice
169dc77cea3b   goharbor/nginx-photon:v2.11.2         "nginx -g 'daemon of…"   39 seconds ago   Up 34 seconds (healthy)     0.0.0.0:80->8080/tcp        nginx
ca2388a8c3f0   goharbor/harbor-core:v2.11.2          "/harbor/entrypoint.…"   39 seconds ago   Up 35 seconds (healthy)                                 harbor-core
8e5c86b31116   goharbor/harbor-registryctl:v2.11.2   "/home/harbor/start.…"   39 seconds ago   Up 35 seconds (healthy)                                 registryctl
0561b5d3fcbb   goharbor/harbor-db:v2.11.2            "/docker-entrypoint.…"   39 seconds ago   Up 36 seconds (healthy)                                 harbor-db
415b3ef363da   goharbor/registry-photon:v2.11.2      "/home/harbor/entryp…"   39 seconds ago   Up 35 seconds (healthy)                                 registry
45358bf34545   goharbor/harbor-portal:v2.11.2        "nginx -g 'daemon of…"   40 seconds ago   Up 35 seconds (healthy)                                 harbor-portal
a81eb3f3042b   goharbor/redis-photon:v2.11.2         "redis-server /etc/r…"   40 seconds ago   Up 36 seconds (healthy)                                 redis
973923fbc97b   goharbor/harbor-log:v2.11.2           "/bin/sh -c /usr/loc…"   40 seconds ago   Up 37 seconds (healthy)     127.0.0.1:1514->10514/tcp   harbor-log
访问站点
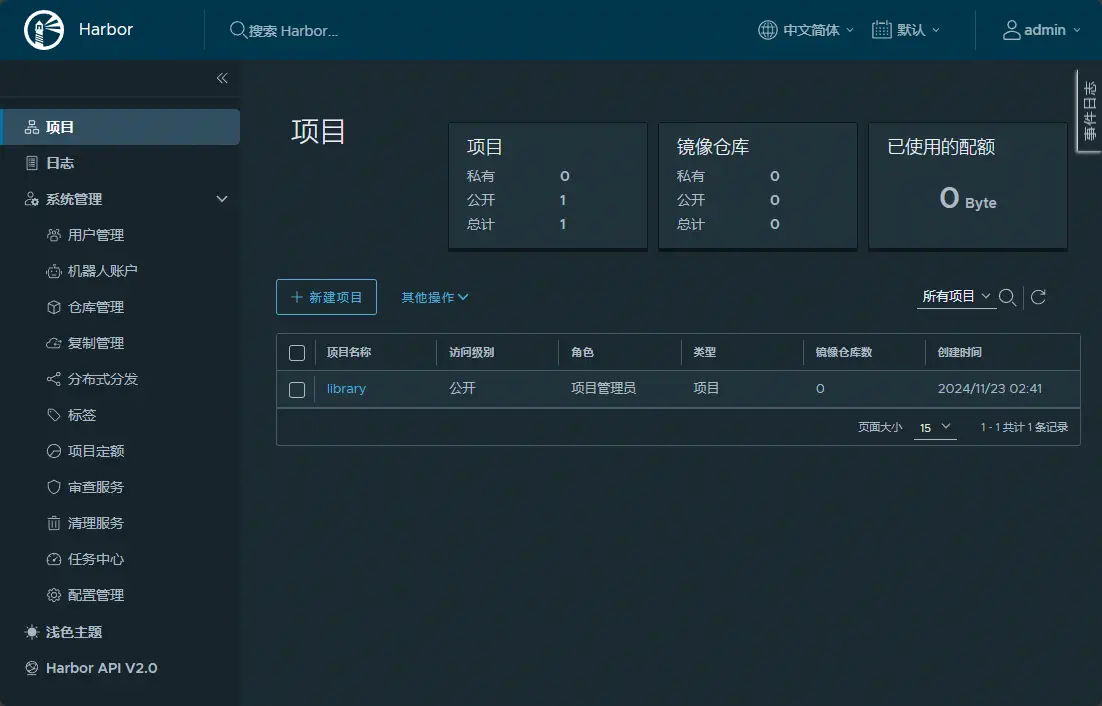
然后我们访问 http://127.0.0.1 就可以看到 harbor 的登录页面了, 默认的用户名是 admin, 密码是配置文件中设置的 harbor_admin_password

推送镜像
推送镜像之前需要登录到 harbor
docker login localhost -u admin -p Harbor12345
显示 Login Succeeded 就表示登录成功了
然后我们给镜像打上标签
docker tag nginx:alpine localhost/library/nginx:alpine
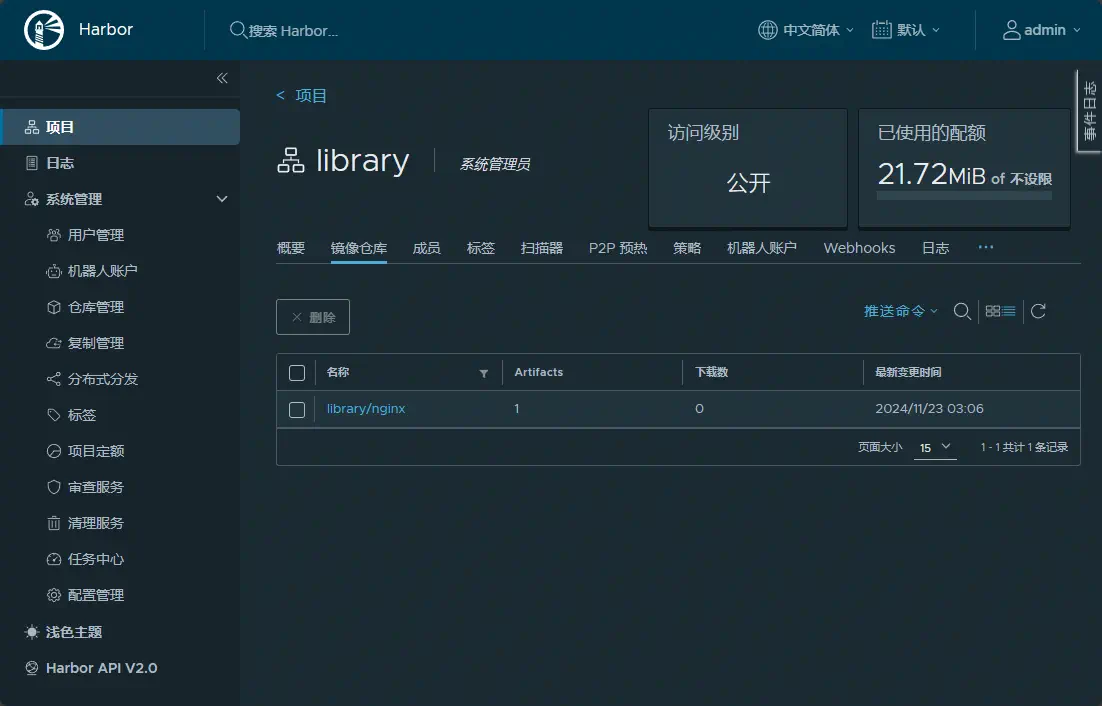
默认情况下 harbor 会有一个 library 仓库, 我们可以将直接将镜像推送到这个仓库中
docker push localhost/library/nginx:alpine
The push refers to repository [localhost/library/nginx]
b67a2e28b4c8: Pushed
1ce97418c44e: Pushed
8d94d71d4b48: Pushed
19d3bde9037c: Pushed
3ca5de8f08eb: Pushed
ffe4285e2906: Pushed
df75bb36e265: Pushed
75654b8eeebd: Pushed
alpine: digest: sha256:32893404590305e6264a784cf0e8f371102463d1a1a436cde7bd1f3c97875f4f size: 1989

这样就成功推送了一个镜像到 harbor 中了, 后续我们就可以在内网的其他地方从 harbor 中拉取这个镜像了
docker pull localhost/library/nginx:alpine
后续
以上就是使用 harbor 搭建私有镜像站的基本步骤了, 服务的启停可以通过 docker compose 去操作